
How to Spread! Best First Kitchen Skill for Kids

Serving Up Family Style Meals
September 9, 2021
Halloween Candy Activities for Kids
October 18, 2021
Spreading is one of the best first kitchen skills and activities for even the youngest of toddlers! It’s fun, gets them building fine motor skills and is a positive way to introduce new foods and flavors.
Cooking with kids provides so many wonderful benefits to kids growth, development and sense of autonomy and relatedness. I talk more about this here. Getting in the kitchen with your kids doesn’t need to be overly complicated or time intensive. That’s why I love teaching kids how to spread. Usually only requires 2 ingredient (something to spread and something to spread on) and one utensil. Oh and about 5 minutes of time. That’s it! Lastly, when all is said and done you have a snack made or part of the meal completed.
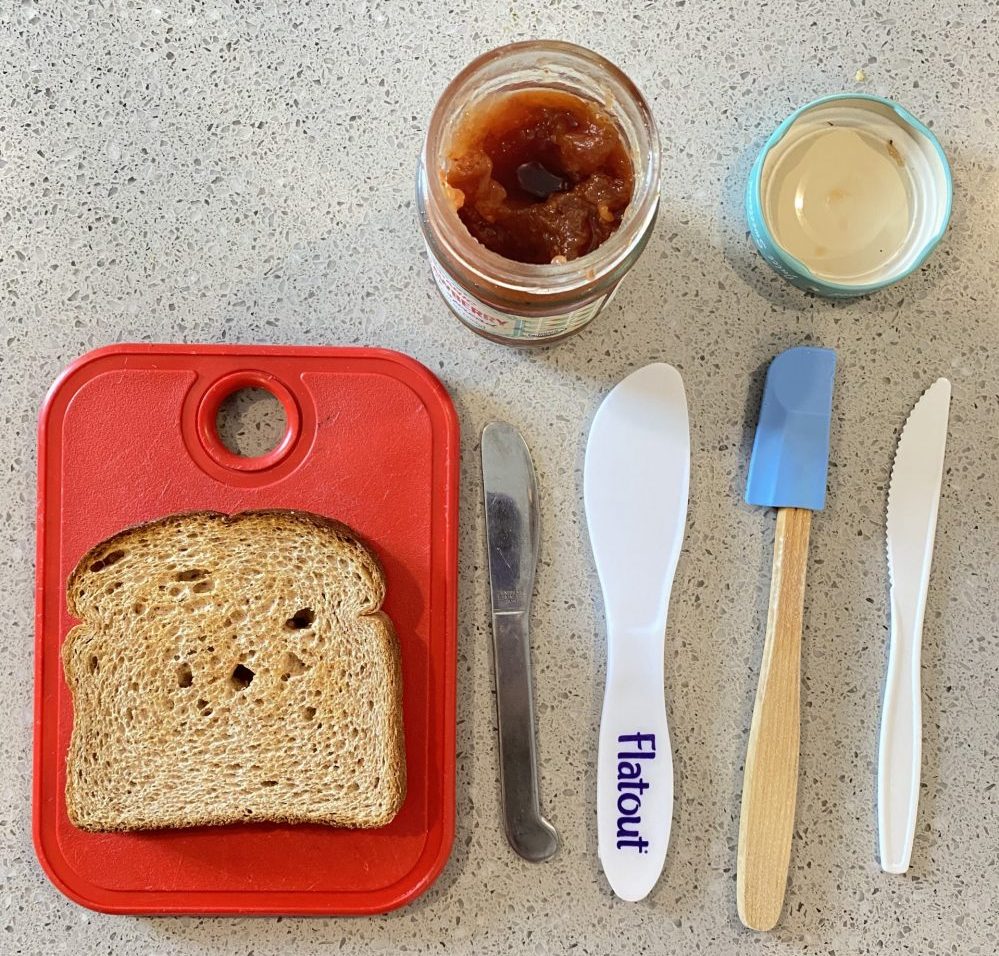
Top 4 Utensils to Use when First Teaching How to Spread
- Sandwich spreader or wide handled spatula.
- Easiest for young kids and toddlers to hold on to. The wide tip allows kids to more surface area to more easily scoop a spread.
- Mini Spatula
- Also has a wide end to make it easier to spread and they are light and easy to hold on to.
- Plastic Knife
- Also light and easy to hold on to. The small end makes it a bit more difficult to spread as there is less surface area.
- Small Butter Knife
- Light enough to hold. Also shorter than a regular butter knife which is helpful for small hands.
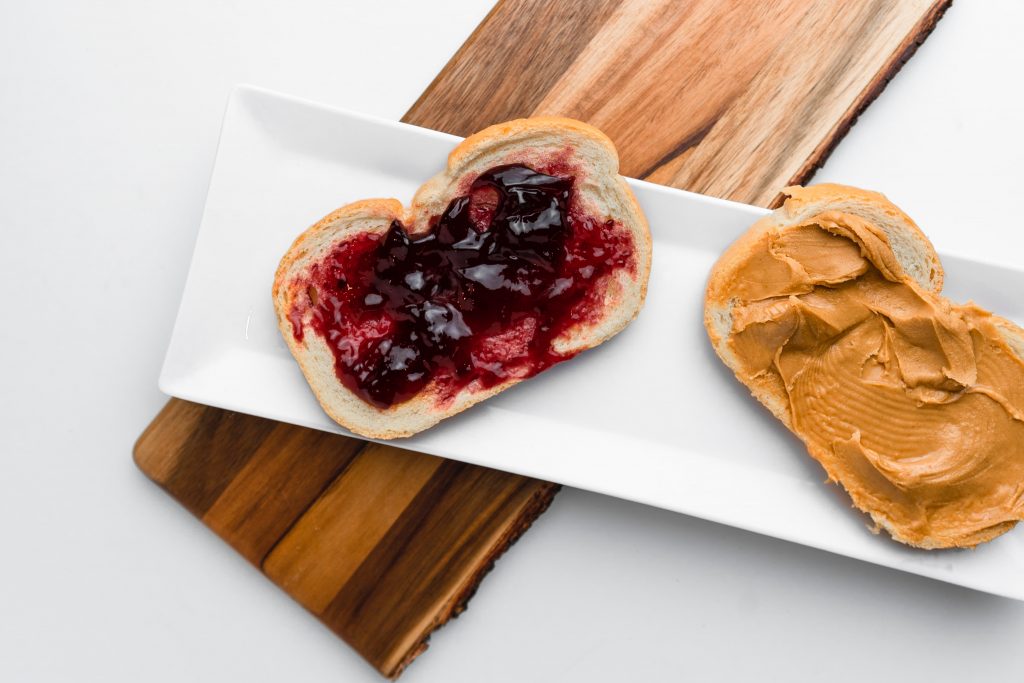
Best Spreads and Dips to Use When Teaching Kids How to Spread
- Jam/Jelly
- Peanut Butter (or other nut or seed butter)
- Mashed Avocado
- Hummus
- Soft cheeses: Softened or whipped Cream cheese, Ricotta Cheese, Goat Cheese
- Yogurt
- Butter at room temperature
- Mayonnaise
- Pesto
- Mashed fruit (like berries or banana)
- Frosting, room temperature
Recipes
What Foods To Spread On?
- Rice Cakes
- Great first food to practice spreading on because it is hard and won’t break when force from spreading is placed on it.
- Toast
- Toast is firmer than regular soft bread and will maintain it’s shape better when force is placed on it.
- Bagels
- English Muffins
- Crackers
- Biscuits
- Pancakes
- Waffles
- Cake
Why Teach Kids How to Spread?
- Quick and easy low mess activity in the kitchen
- Helps teach fine motor skills, helpful in building skills for holding writing utensils for writing and drawing.
- Fun low pressure exposure to new foods.
- Use this activity as a way to introduce a new spread or dip. Have them put the spread on their favorite bread or other food (see above).
- Introduce a new food by spreading on their favorite jam, dip or spread.
- Allows kids to use their hands to explore foods first which is a great way to get kids more comfortable around a new food.
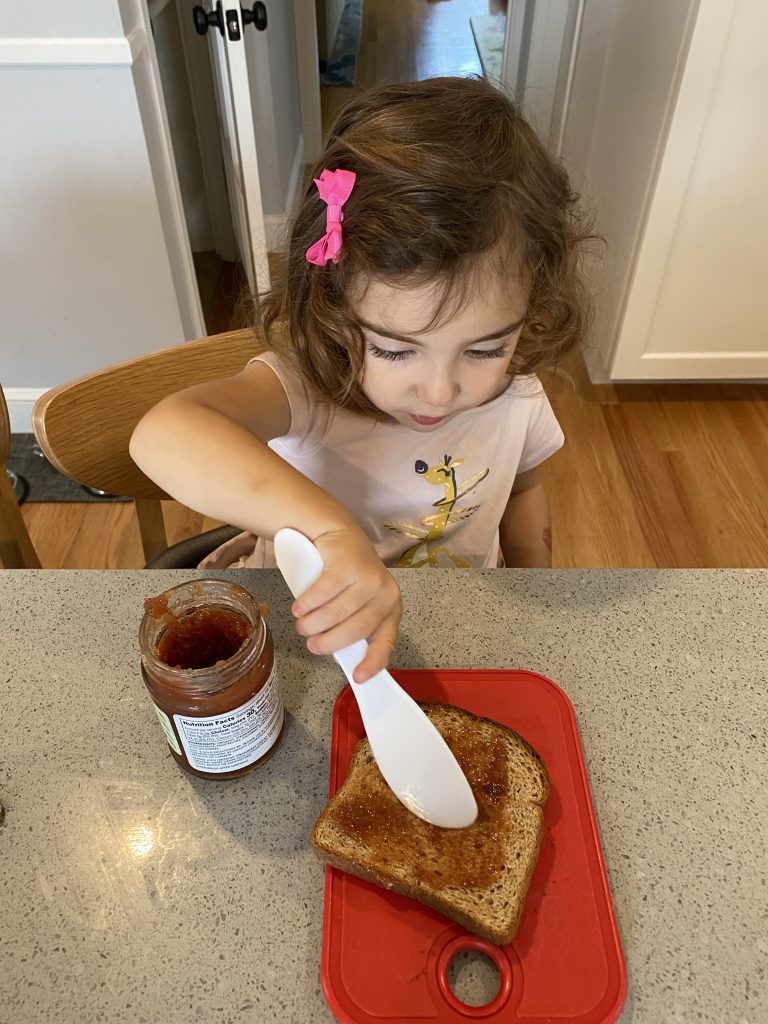
Tips for Teaching Kids How to Spread
- First demonstrate! Show them hold to hold the utensil in their dominate hand with the head flat (with a slight angle).
- Have them scoop out spread with spoon (this is easier!) or knife.
- Place the jam/spread on the corner or side farthest away from them.
- Then have them pull the spread towards them. Reminding them to keep the utensil flat at a slight angle.
- Repeat as needed encouraging them to “color” or cover the whole bread.
- As they practice and get better try having them practice spreading from left to right, right to left.
- Reminder that this is a hard skill to perfect! It takes lots of practice so keep trying and practicing when you can.
Looking to teach your kids even more kitchen skills?! Check out my post on Top 4 Knives for Kids + Teaching Knife Skills.
Here are some other easy cooking lessons you can do with your kids at home!
